Brian Velazquez Lab #7 Filters 12/01/16
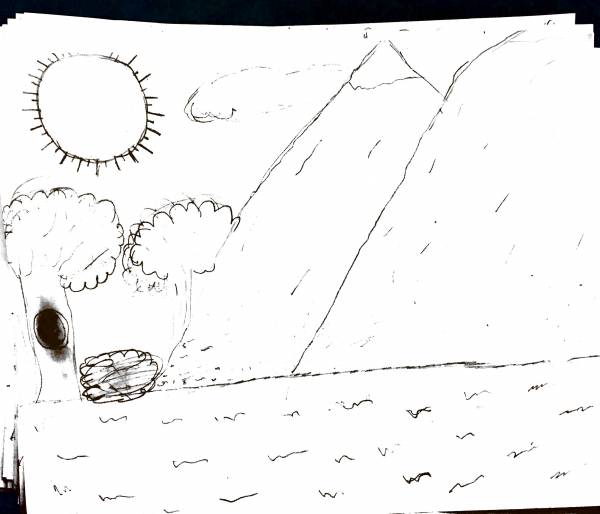
What we did in this lab was we selected 2 photos and with one of them we copied it 5 times. After that we used different filters for each of the photos to make them look different. The objective of the lab was to have a different filter for each of the photos making them unique. We did this lab by using the filter gallery to find the filters we wanted to use.
The software we used for the lab was Photoshop CS6. This is relevant to web design because it can change pictures to make them unique and different then other. I see myself using these skills in the future for changing how pictures look and even change things in picture.
Friday, December 9, 2016
Lab 6 Reflection Journal
Brian Velazquez Lab #6 Vector Shapes 11/28/16
In this lab what we did was similar to lab 5 but instead of using colors we decided to use shapes to fill in our drawings. The objective of the lab was to get us acquainted with the shapes and different ways how to use them. We completed this lab by using the shape tool to match the shapes we used in the drawings to fill them in with color and shape. The drawing will be in the right.
The software we used to complete this lab was Photoshop CS6. This is relevant to Web Design because in the future we might use different pictures and need to fill it in with shapes. I see myself using these skills in the future to fill in different images with different shapes.
![](https://blogger.googleusercontent.com/img/b/R29vZ2xl/AVvXsEiI36JJy0HnY9TjGqDeDzqQ8h7IXktok9ygLS6yrggmNE62vpoktHbEEf__i3K0pawkZBHanSNUDPqrdL8NPDJipyuz0NYEmVVpTWeE3OoP2CcYRJwdjqIA62cjxqtuit6qsI5cDEEdedY/s320/Drawing+.jpg)
The software we used to complete this lab was Photoshop CS6. This is relevant to Web Design because in the future we might use different pictures and need to fill it in with shapes. I see myself using these skills in the future to fill in different images with different shapes.
Lab 5 Reflection Journal
Brian Velazquez 11/27/16
In this lab what we did first was draw a picture in 10 minutes. After that we had to use photoshop to color our drawings. The objective of this lab is to teach us how to use the brush tool to color in and fill our drawings. We completed this lab by using multiple tools such as the brush tool to color in our drawings and the quick selection tool to keep the color inside the lines to were it belongs.The picture I drew is to the right.
The software I used was Photoshop CS6. This is relevant to Web Design because we might use the tools we used for lab in future photos we can color and fill it in. I see myself using these skills in the future to make photos look better and mix and match colors.
Brush Tool Lab
![](https://blogger.googleusercontent.com/img/b/R29vZ2xl/AVvXsEh1YwOHT8xLX8HbF-DDITdnpH208mDHMIls9U8sq6RSoVIB6MmRV82yOr5GWm_x8INULm1GG92wJwsYDuiV97eWOtg237CTc7B-vPUmfrPvRk5WoFStuFz1hbt664rOt2q9hhrJvjunvu8/s200/Drawing+.jpg)
The software I used was Photoshop CS6. This is relevant to Web Design because we might use the tools we used for lab in future photos we can color and fill it in. I see myself using these skills in the future to make photos look better and mix and match colors.
Sunday, November 20, 2016
Lab 4 Reflection Journal
Brian Velazquez
In this lab what we had to do was use the photos that we took on the photography hike with the camera and choose six of those photos to use. The photos we had to choose were are suppose to be a close up, high point, low point, landscape, eye level shot, and camera angle. The objective of the lab is to get us to learn how to use a camera and how to take good pictures and in different angle. I did the lab by going on a hike in flushing meadow park and taking many different pictures and even standing in one place and taking many different pictures of different things.Then choosing out of those photos the 6 I thought were the best for those catergories. And putting them in rows with each other.
The software I used was Adobe Photoshop CS6. This is relevant to web design because in web design we will be working with many different images. I see myself using these skills in the future when working with different images to do a lab or project.
Project 2 Reflection Journal
Brian Velazquez Visual Design
Collage And Lettering Project
In project 2 what we had to do was find an image of a famous person or a person you admire and
create a collage and silhouette of the person. The objective of the lab was to teach us how to use the mask and how to make a work path. The first thing I did was looking for an image of a person I admire which is to the right,
then I made a selection of the person to create a blur effect on the background. Then I found 8 photos that have a connection to the person himself and organized them in a appealing way which completed the collage. For the silhouette I first typed a sentence about the person then I selected a inverse of the person and created a work path the I pasted the sentence all around the person to finish the silhouette.
The software I used to do all of this was Adobe Photoshop CS6. This is relevant to web design because using all these tools including masks, work paths are a big part of web design. I see myself using these skills in the future in other labs and projects that are coming.
Collage And Lettering Project
![](https://blogger.googleusercontent.com/img/b/R29vZ2xl/AVvXsEhnah0U345bpxye5e5AexCJdYNtH4eVA04ktXC_mRqUpqutIVVWFWFscSsyIz47Z31yRmJh4e6tOSxhKgcS841PF0YgvvVxSrJ6t_qMIFxAS4VFXm7W3r9MwLSvkQf0IZtKt1UpjJzNO1U/s200/Joey+Tribianni.jpg)
create a collage and silhouette of the person. The objective of the lab was to teach us how to use the mask and how to make a work path. The first thing I did was looking for an image of a person I admire which is to the right,
then I made a selection of the person to create a blur effect on the background. Then I found 8 photos that have a connection to the person himself and organized them in a appealing way which completed the collage. For the silhouette I first typed a sentence about the person then I selected a inverse of the person and created a work path the I pasted the sentence all around the person to finish the silhouette.
The software I used to do all of this was Adobe Photoshop CS6. This is relevant to web design because using all these tools including masks, work paths are a big part of web design. I see myself using these skills in the future in other labs and projects that are coming.
Monday, October 31, 2016
Project 1 Warhol Reflection
In Project 1 what we did was took a picture of ourselves and turned it to a warhol portrait such as the picture to the left. The objective of this lab was to help us learn more about the tools we would be using in the future, and also help us figure out which colors go well together. I created this warhol portrait of my self by using many different tools to help me including the quick selection tool, and magic wand tool. We used these tools to select ourselves and put ourselves on a background. After that we added color to the background and ourselves using the paint bucket tool while lowering the saturation.
The software I used was Adobe Photoshop CS6. This is relevant to web design because using these tools will help us get more acquainted with them and will allow us to maybe add these changes to different photos. We might use these skills in the future to maybe change a photograph and make it more better.
Thursday, October 27, 2016
Lab 1 Reflection Journal
Lab 1
In lab 1 we had to use different fruits and cut them out into layers. Using different tools to select them and make them into layer the fruits we used are below.
The objective of this lab was to help use practice and get more use to the tools we will be working with and learning to transform a selection. To select the blueberry, carrot, kiwi, and melon we needed to use the elliptical marquee tool after we selected the fruits we then made a layer for each of them. Then we used the magic wand tool to select the mushroom and orange and made layers out of those. Lastly we used the magnetic lasso tool to finally select the radishes and macaroni. The software we used was Adobe Photoshop.
This is relevant to web design because when we start to create websites and edit photos we can use these skills to do certain things. Like change an image to the way that it looks more pleasing to look at. I see myself using these skills in the future to edit photographs and change the way its suppose to look like.
Lab 2 Reflection Journal
Lab 2
In this lab our teacher gave us an image of her dog which is named Lancelot. What we had to do in lab was to make a good selection or her dog hair included and leave out any parts of the back. After we make the selection we had to make 8 other copies of the dog and make it smaller then for each dog we had to make different adjustments on each.
The beginning picture we started with is this one below.
The objective of this lab was to help learn how to make a good selection with minimal mistakes. We also had to learn how to use different types of adjustments. We did this lab by using the quick selection tool to make a selection of Lancelot then we used a mask to make a more clear and better selection with minimal mistakes. After we made the selection we made 8 copies and transformed them to smaller dogs. For each dog we then made different adjustments changing each of them. The software we used to do this is adobe photoshop.
Lab 3 Reflection Journal
Lab 3
In lab 3 we were given a photograph of a car. What we had to first was to create a background then duplicate 4 copy layers of the car. We had to order the cars in a diagonal kind of way from corner to corner, then for each of the cars we had to make different adjustments to them.
The car we were given is below
The objective of this lab was to teach us more about adjustments and what they are capable of doing. We did this by ordering the 4 copies made of the car in a diagonal way corner to corner. After this we had to use a non-destructive technique to add the adjustments to each copy. We used the rectangular marquee tool to do this we used the tool to select one copy the add the adjustment. The software we used to do this was adobe Photoshop.
This is relevant to Photoshop because when you want to change or maybe add more color to an image you can use these techniques to make your photo look more attractive. We will be using these skills in the future when we need to change something in an image or put less of something.
Thursday, September 22, 2016
Vocabulary Definitions
JPEG ( Joint Photographic Experts Group) - A format for compressing image files. You would use JPEG to have less storage space usage, also when saving an image JPEG has the ability to reduce the files size up to 15% without losing the quality of the photo the smaller the file size the quicker the upload to a webpage.
PNG ( Portable Network Graphics) - Is a file format for image compression. PNG would be best used for logos which involve transparency and fading. Also for complex images like photographs if file size is not an issue.
![](https://blogger.googleusercontent.com/img/b/R29vZ2xl/AVvXsEiBB8YzDcQ7VH9bhfc2sHaziUBQgYA_i84-sP6EX5TnAjhp5Kjopd_1yRq-rAeEiHVonZ_0vD1kTgp7RkT2pqWw557Kf7clWGUsoK7t_nwUhJwSuioHVehJKDaHDXxlU_TU9DgZ86OvTqQ/s200/GIF.png)
GIF ( Graphics Interchange Format) - A lossless format for image files that supports both animated and static images. GIF would be best used for animations, Simple Images, and web graphics with few color.
![](https://blogger.googleusercontent.com/img/b/R29vZ2xl/AVvXsEjnP1NO3BRFrlPc-etutpRkk-amZcaIysr6htLqWfV1jVMiu2ONHadGPnlLVwKUxfK3z5EJ4TwreePIIAPP4q058yDax4gr5NE4b8J2hD971Ud2Us4s068d9tJbRYhzRF7gkd-yMoJWiQE/s200/RAW.jpeg)
RAW - A camera Raw image file contains minimally processed data from the image sensor or either a digital camera, image scanner, or motion picture film scanner. Raw files are named so because they rare not yet processed therefore are not ready to be printed or edited with a bitmap graphics editor. RAW will be used to get the best quality because when shooting raw you get all the data from the sensors. Raw can also record greater levels of brightness even more than JPEG.
![](https://blogger.googleusercontent.com/img/b/R29vZ2xl/AVvXsEgWjFtirxlIPe-SZPns2iPwDItI3OICM0ESsP5nk2LoH9hT2ac_ivZq84rPu2wCC-kHgVCT1TkaC8_Y5LL9ed8mqLTdZ8Iu3EOwez2GMmkyy3lycr5YjWaxIN_8EBU07Bc3wJ-UvbSiet8/s200/TIFF.png)
TIFF ( Tag Image File Format ) - One of the most common graphic image format. Tiff files are mostly used in desktop publishing, faxing, 3D applications, and medical imaging application. The TIFF files can handle color depth range from 1-bit to 24-bit. This what the Tiff format can be used for.
Thursday, September 15, 2016
Windows Vs. Mac
September, 15, 2016
There are many differences between the two brands Windows and Mac. Today in class we decided to talk about the differences between the two brands. Some of those differences include both of the brands have use different keys for shortcuts for example windows uses the control key and Mac uses the command key. Both brands have different UI (User Interface) and different designs. Also windows can be better to handle pc gamers more than mac.These are differences we discussed during class that windows and mac have.
Wednesday, September 14, 2016
Who am I? Why am I here?
September, 14, 2016
My name is Brian Velazquez, I am a 14 year old. I come from two different countries the first country I come from is Mexico the second country I am from is Dominican Republic. My parents are divorced and my mom is married to my Step-Dad. I like to play basketball and I like to do much other stuff to for example I like to play games spend time with family and more.
Why am I here? Is a good question I'm here to learn more about technology and web design. I love to use technology because it is a big part of today. It's everywhere we go at schools, home, etc.. I want to learn more about how to use technology to create things in the internet or make something that is my own.
I'm thankful very much to be here and grateful for the teacher. I feel very privileged to be here in this class to learn something some kids don't get the chance to learn. I'm ready to do my best and give Web design all my effort and commitment.
Subscribe to:
Posts (Atom)